This past Christmas I was asked again to create baskets for an executive to give to his clients. This year, I thought I would show you progress photos so you can see some of what I do to create these.
Some of my photos were taken using my iPhone, so please excuse the quality of those.
The first thing I do is head to Michaels when the baskets and other things I need are on sale (BUT also armed with my 25% off my entire order INCLUDING sale items!) The baskets were 50% off, plus the 25% coupon - that is 75% off! This is usually the same time I pick a mini theme - based on what I can get on sale. This year I was able to have a Cardinal theme. The baskets had a cardinal on them, I found a cardinal ornament as a basket filler, and I made cardinal cards. The colours of the packaging inside the baskets were coordinated with the "cardinal" colours.
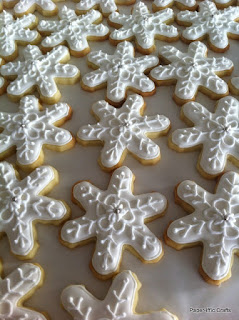
Next, I bake. I made 7.5 dozen decorated cookies, 5 dozen cake pops, and I lost count of how many chocolates I made. I just kept stuffing the boxes until they were full.
The cookie boxes were made to hold four cookies each for a total of three boxes per basket and a dozen cookies. Three boxes per basket meant that I had to make 21 boxes (plus one for my client).
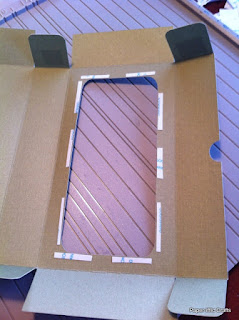
I cut each box out of my coordinating cardstock using my Cricut cutter and a custom design I made using Make The Cut. I use Sookwang adhesive tape when creating boxes because I know my boxes will stay together using this stuff (plus no drying time with liquid glue). I have to cut small pieces around the window as I did not want to waste my plastic for the windows. That stuff is expensive, but very durable.
Next, I decorated the edge of the boxes with coordinating border strips I found at Michaels. I added Christmas printed parchment paper inside the box to protect it from the cookies, added the cookies, then tied them up with some bakers twine (I picked this twine up last year after Christmas for a steal!)
Next cake pops! I should mention that the flavours for the cake pops were vanilla cake with vanilla icing, with white candy melts, then coated with coconut, or crushed candy canes, or decorated with some neat holly and berry decorating bits. I had picked up Christmas themed boxes and filled them with floral foam. I added some white basket filler paper, then started to cover and tie a bow around each cake pop, and add them to the box in a flower arrangement. The only semi-sure way to display and keep cake pops protected is to store them upright like this. If I lie them down, they don't look as pretty, and they tend to crack easier. When I was making the cake pops, I had to stop and go out to the garage to make a custom cake pop stand so each cake pop could harden. I had some left over pine wood, cut them to lengths that would fit in my fridge, then penciled in where the holes should go. I did not want the holes to go all the way through otherwise the cake pops would fall through. So I measured off how far the drill would go down, and covered the no-drill zone with painters tape. My stands are pretty rustic, and are not for display purposes - but they do the trick! Last year I used styrofoam and poked them in it - that was a pain in the rear!
Ok - getting closer. For some reason I don't have any photos of the chocolates, or the making of the boxes. I was probably pretty time crunched at that point. Each box was cut using my Cricut (2 per basket) into a Chinese take out box. I found the size I liked at Michaels, took it apart, traced it on paper, scanned it, then manipulated the scanned image with Make The Cut, to cut out using my Cricut. I made the handles out of green, red and gold wire I already had. I added some more parchment paper inside and filled them up with little chocolate gingerbread men, tiny candycane flavoured snowflakes, larger mint flavoured snowflakes, etc. There had to have been hundreds of these as they were each very small and I filled the boxes to the top.
The last thing I did was make the coordinating cards. I did take pictures of the entire process of colouring using my Copics, but this post is already too long winded. So I will give you the Coles notes version.
Stamped the Cardinal image I found at Scrapbookers Paradise using Memento ink, onto Copic friendly cardstock. The colours I used are shown in one of the photos. I searched for Cardinal photos online and noticed that they are pretty dark around their beaks and eyes, so used my black multi-liner to add and enhance some of this colour. Once the image was coloured in, I used a pen glue on the snow areas, and added very fine glitter. I again used my Cricut to cut the sparkly frames and used foam dots to make it pop out from the image. Stamped a holiday generic message inside, added envelopes, and wrapped this all up in a red bow for the client to sign and add to his baskets.
Sookwang tape to place the bows I made, and called in the courier (but first I took some pictures of the final product. Wanna see??
And the final comment from the client and his admin assistant - they were blown away and very happy with their baskets. All in a days work......er...several weeks work!


Oh my goodness Lisa! These are fantastic! What a huge project! I'm impressed!
ReplyDeleteThanks Carla!
ReplyDeleteThese are very impressive, Lisa. I was hoping I would see what the baskets looked like
ReplyDelete